December 21, 2010

My First Candy

Last week (or perhaps the week before by now) I had my first go at making candy (or at least I’m calling it candy because Reese’s counts as candy). I made some Peanut Butter Chocolate Bars which are akin to homemade Reese’s. Everybody loves Reese’s, right? Unless you’re allergic to peanuts. Then Reese’s and peanut butter in general make you very uncomfortable. Make sure you have an epi pen/shot handy!
Let’s take a minute here to appreciate where Reese’s peanut butter cups came from beginning with peanut butter. Did you know in the US January 24 is National Peanut Butter Day (not to be confused with January 26 which is National Peanut Brittle Day)? Peanuts have been around for an exceptionally long time. They have been found in tombs of Peruvian mummies, in Africa peanuts were ground into stews as early as the 15th century, and the Chinese have crushed peanuts into sauces for centuries. Many people believe that George Washington Carver, who found 300 different uses for peanuts, invented peanut butter, but in fact he just made preliminary versions of it better. Seventh-Day Adventists claim that one of their own was responsible for creating peanut butter as Dr. John H. Kellogg (yes, like the cereal) played a major role in the development of peanut butter. His 1897 patent for the “Process of Preparing Nutmeal” produced a pasty, adhesive substance that he liked to call nut butter. In 1903, Dr. Ambrose Straub obtained a patent for his peanut-butter making machine. He became interested in peanut butter as a potential source of protein for his toothless, elderly patients. While Krema Products Company in Ohio is the oldest maker of peanut butter to date, the smooth, creamier peanut butter that is familiar today had its roots in Alameda, California. Around 1922, Joseph Rosefield created shelf-stable peanut butter that was smoother and creamier than its more mealy predecessor. His peanut butter became Skippy Peanut Butter.

Reese’s Peanut Butter Cups were created by H.B. Reese, who also founded the H.B. Reese Candy Company. Reese worked a variety of jobs before moving to Hershey, PA for a second time and working for the Hershey’s. He was so inspired by the candy making there that he began to experiment with candy making in his basement and named his early prototypes after his children, Lizzie and Johnny. Several of his early candy-making ventures failed, but by 1920 he was manufacturing his now famous peanut butter cups, formerly called “penny cups” so named because they cost one penny. Before long Reese founded the H.B. Reese Candy Company (1928), also located in Hershey, PA. Reese made other candies besides the peanut butter cups, but during WWII he limited production to only the peanut butter cups. The chocolate for the cups was actually Hershey’s chocolate and the wrapper said “Made in Chocolate Town, so they must be good”. Seven years after Reese’s death in 1956, Hershey Chocolate Corp. bought the H.B. Reese Candy Company and that is how peanut butter cups became Hershey’s Reese’s Peanut Butter Cups.

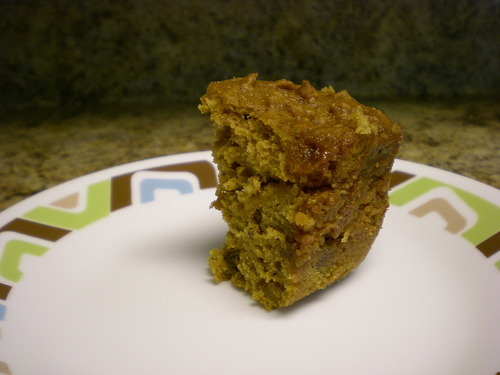
Now back to these bars. I was pleasantly surprised by how simple and quick it was to make these bars. There’s no baking involved and no real cooking at all. As these are bars and not individual balls of peanut butter, there was no endless dipping, dripping, and placing on a sheet of parchment paper or wax paper. These really do taste like Reese’s with that added hint of homemade (my favorite!).
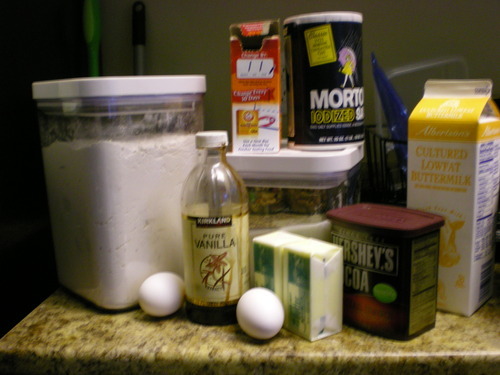
This recipe is super simple and only involves 5 ingredients: brown sugar, powdered sugar, peanut butter, butter, and chocolate chips.

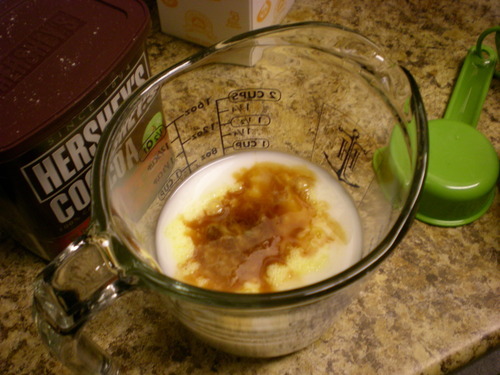
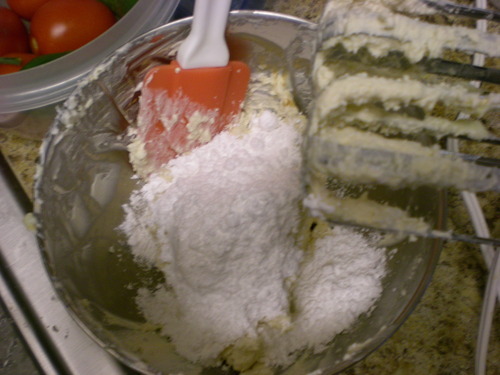
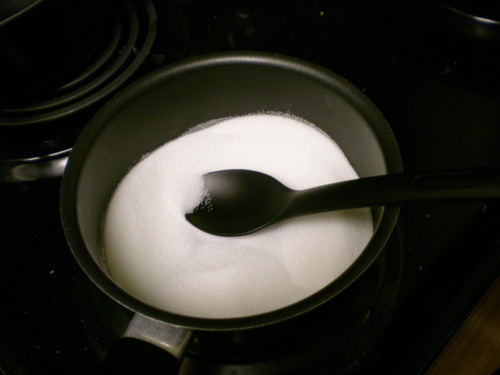
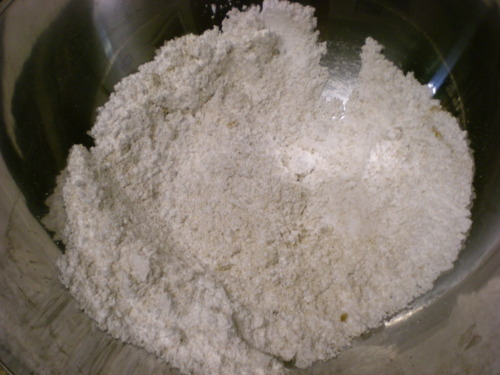
First, combine the brown sugar and powdered sugar (what is with calling it confectioner’s sugar?)

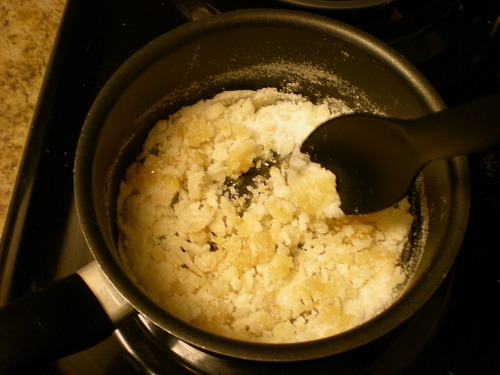
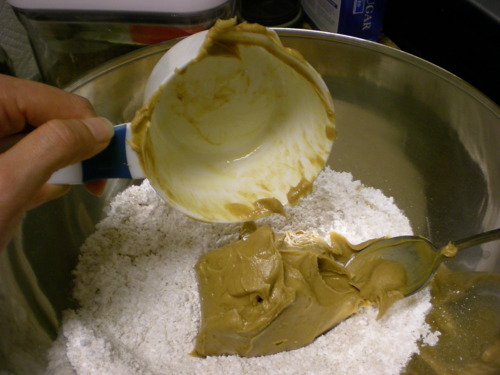
Next add in the peanut butter. Awesome tip: spray your measuring device with cooking spray before measuring out the peanut butter. This helps make the peanut butter slide right back out and into the bowl.

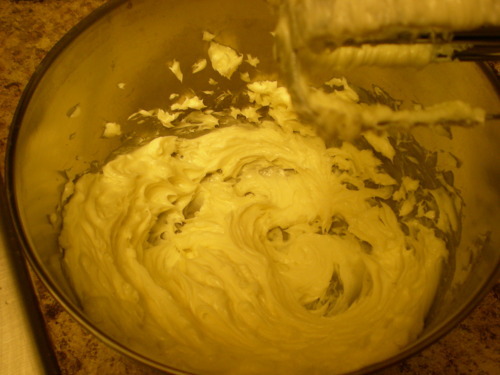
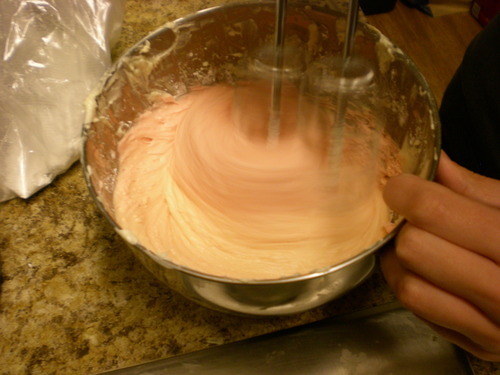
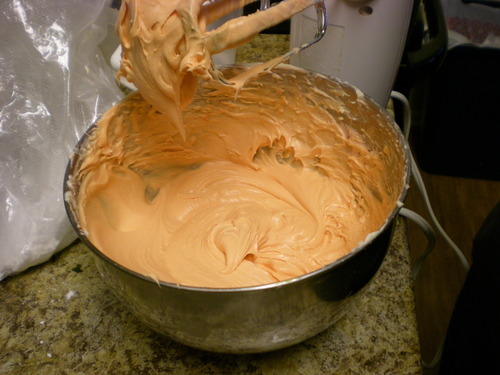
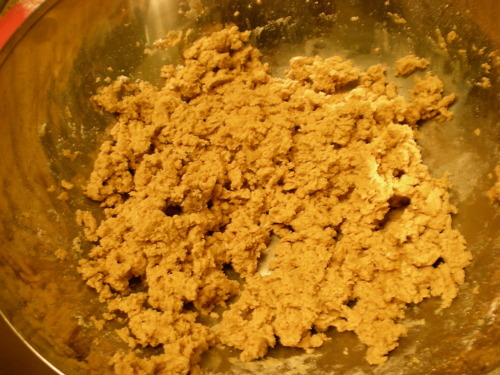
Mix this together with an electric mixer if you have one. If you don’t have one, then this will be a great right (or left) arm work out.

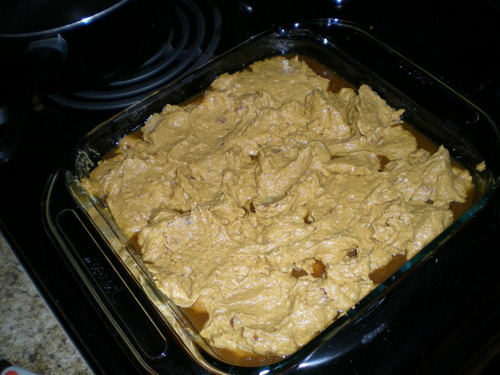
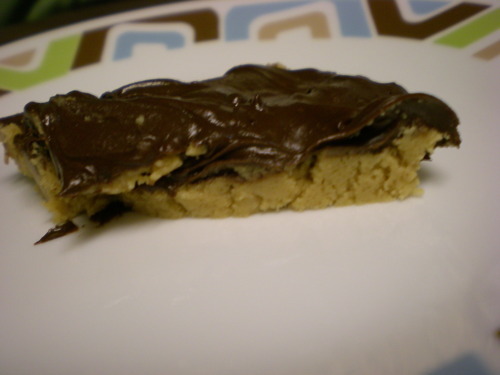
Next take this peanut butter mixture and pat it into an ungreased pan. I considered lining my pan with parchment paper but didn’t in the end. The bars came out just fine. When I made the recipe I halved everything and made it in a half-size baking sheet. I felt that the peanut butter layer was a  bit thin for me. There’s no really elegant way to do this. Just use your fingers to fill in all the holes.

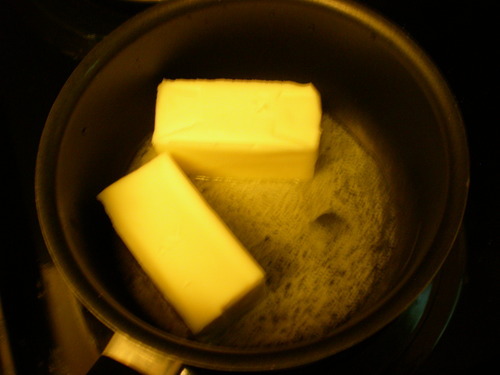
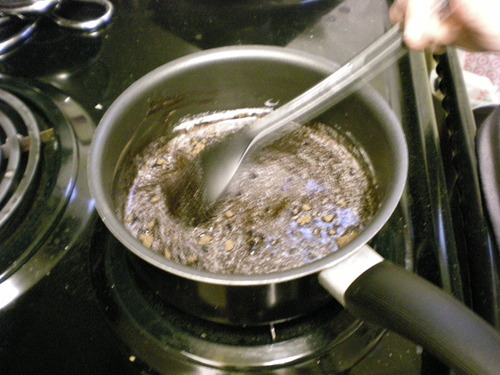
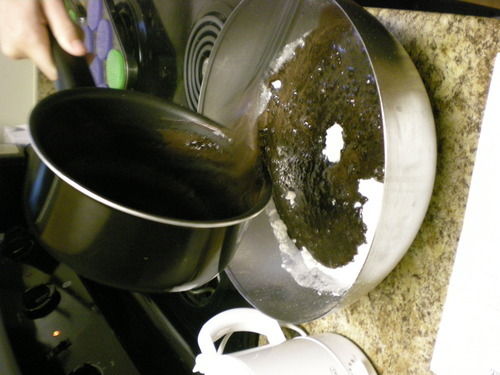
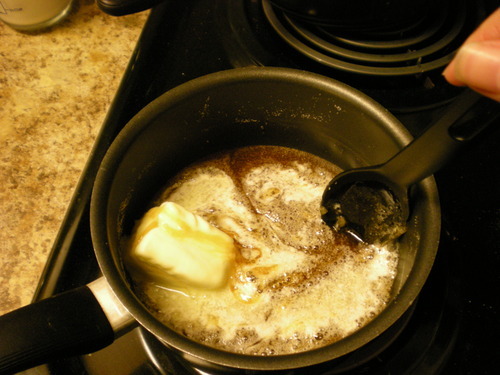
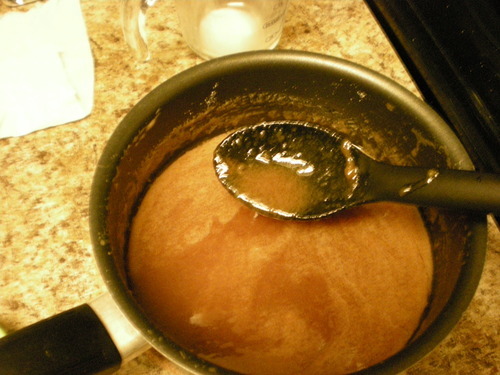
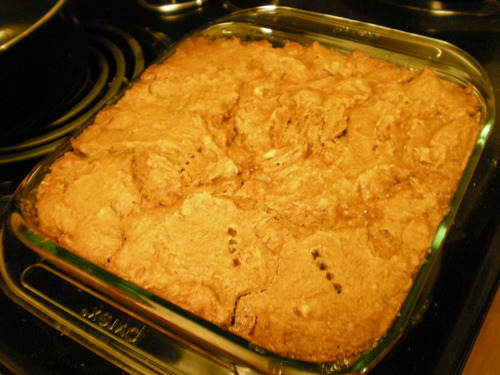
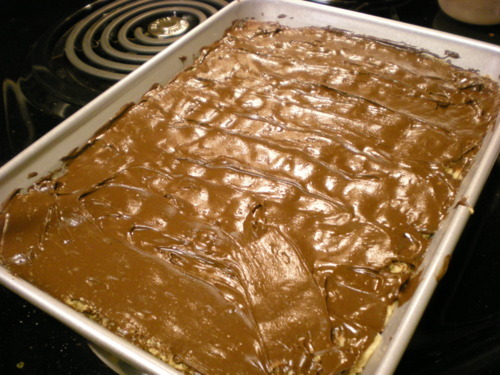
Once that is done, melt the chocolate and butter either in a double boiler, make-shift double boiler or in the microwave in 15 second bursts at 50% power (the latter is my preferred method). Let it cool slightly then pour, spread, and smooth over the top of the peanut butter mixture. This also takes a bit of patience to get the entire surface covered.

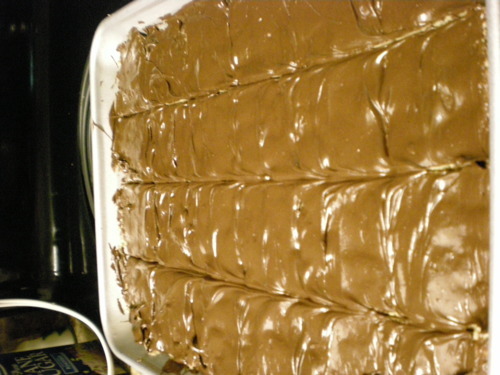
Before putting it into the fridge to chill for 15 minutes, use a knife to cut it into squares/bars. You really want to do this now because the chocolate will become hard and difficult to cut through once completely chilled.

Wait patiently for at least 15 minutes before enjoying.

Peanut Butter Bars
Ingredients 3/4 cup firmly packed dark or light brown sugar3 cups powdered sugar1/2 cup salted butter, softened2 cups smooth peanut butter2 cups semisweet chocolate chips1 tablespoon salted butter
 Directions 
1. In a large bowl, combine the brown sugar, powdered sugar, butter, and peanut butter, and beat them with an electric mixer until they are smooth and well blended. Pat into an ungreased 15 1/2 x 10 1/2 x 1-inch pan. Roll the mixture flat on top with a rolling pin.2. Melt the chocolate chips and butter on top of a double boiler or in the microwave. Spread the chocolate mixture over the peanut butter mixture and cut into squares while the chocolate is still warm and soft.3. Chill the mixture for about 15 minutes and remove the squares from the pan. Store in the refrigerator.
Recipe from Fake Ginger

December 14, 2010

It's Beginning to Look A Lot Like Christmas


I am happy to report that after a two month hiatus from posting here I am, in fact, alive and well. I have just emerged from the formaldehyde and phenol-filled clutches of anatomy and I cannot overstate how thrilled I am to be free of it for a few weeks. Today, despite the exam this morning, has been a fantastic day! What better way to celebrate the first anatomy exam than a holiday party? And what better to make for a holiday party than dark chocolate cupcakes with white chocolate peppermint buttercream frosting? To top off the evening I am writing up this post and watching Emma. Perfect.
Speaking of movies, I can’t help but be excited for my traditional (and growing) holiday line up. Before the holiday season is over I need to watch:
Love, Actually  (can’t wait!)
White Christmas (i have loved this movie since childhood)
A Muppet Christmas Carol
Dan in Real Life
While You Were Sleeping (maybe)
Leap Year (ok, this one isn’t related to Christmas, but I just love it. It’s a bit of a guilty pleasure)
Apart from these, I just want to take a moment to highly recommend Tangled. It’s adorable and full of that Disney cheese that kids of my generation were raised on. I loved it. Can’t wait for the DVD.
And now back to your regularly scheduled programming.
These cupcakes were inspired mostly by my desire to make something in the winter holiday vein. The recipe for the frosting comes from Cookie Confession and was inspired by Starbuck’s white chocolate mocha holiday drink.
First off, throw together your favorite chocolate cake recipe. As I said, I was in a rush so I just used the cake recipe on the back of my Hershey’s Dark Chocolate Cocoa Powder….primarily because it was in front of my face. Also, it’s not as complicated as other chocolate cake recipes I’ve made.
While the cupcakes are cooling off, it’s a good time to whip up the frosting.
Take your softened butter and whip it with an electric mixer until it’s nice and creamy.

Next, melt down the white chocolate. I don’t have a double boiler and I think using the stove is a bit of a pain so I used the microwave. I heated the chocolate in 15 second bursts at 50% power, stirring in between. Let the melted white chocolate cool a little before adding it to the butter. Toss in the peppermint extract and stir it all together. Primarily to get the frosting to the desired consistency (and somewhat to adjust the taste or sweetness) add 1-2 cups of powdered sugar incrementally. I think I ended up adding around a cup. I wanted to make my cupcakes red and green so I divided the frosting into two bowls.

Add in the food coloring, stir and start frosting those cupcakes!


I decorated my cupcakes with some sprinkles and candy canes. I had originally intended to break up the candy canes, but I ran out of time before I could smash them to bits. In the process of placing the candy canes on the cupcakes, however, I did manage to drop a candy cane on the floor which promptly broke into several pieces. Note to self: to break candy canes, place them in a bag and throw them to the floor repeatedly. If you’re really cool like my ex-roomies, though,  you will have candy cane decorations that are all broken up for you already (I looked in 4 stores today and couldn’t find it, which was very sad). Despite being in a rush and making more of a mess than usual in my kitchen, the finished project turned out decently. I received only positive feedback at the party so I think they even tasted alright. (Please note, I do not recommend making something for the first time when you are going to give it to people, however, I get so little chance to bake things for myself or others that I like to make new things all the time. Mostly it works out. Perfection is overrated.)


If that doesn’t get you in the holiday spirit then this surely will:


…or maybe not.
Peppermint White Chocolate Buttercream Frosting
1 cup (2 sticks) unsalted butter, softened
12 oz. white chocolate, melted and cooled slightly
1-2 cups powdered sugar
1 tsp peppermint extract

Cream the butter. Melt the chocolate either in the microwave or with a double boiler. Let the chocolate cool slightly then add to the butter. Add peppermint extract. Add powdered sugar incrementally and mix until desired consistency and sweetness is achieved.
Hershey’s(c) “Especially Dark” Chocolate Cake
2 c. sugar
1 3/4 c. all-purpose flour
3/4 c. Hershey’s Special Dark Cocoa (or you know…any cocoa)
1 1/2 tsp. baking powder
1 1/2 tsp. baking soda
1 tsp. salt
2 eggs
1 c. milk
1/2 c. vegetable oil
2 tsp. vanilla extract
1 c. boiling water
1. Heat oven to 350 F. Grease and flour two 9-inch pans or prepare cupcake liners.
2. Stir together sugar, flour, cocoa, baking powder, baking soda, and salt in a large bowl. Add eggs, milk, oil and vainlla; beat on medium speed of mixer for 2 minutes (I actually stirred then whisked by hand). Stir in boiling water (batter will thin). Pour batter into prepared pans.
3. Bake 30-35 minutes (18-22 min. for cupcakes) or until toothpick/fork inserted in center comes out clean. 

October 31, 2010

Happy Halloween

It’s Halloween! What’s even more frightening? Tomorrow will be November! I just don’t know how time slips by so quickly.
Things I learned this weekend:
1) I miss Los Angeles.
2) I miss being in marching band an embarrassing amount.
3) I need to learn how to study faster.
In honor of Halloween earlier this week I made these cute chocolate cupcakes with candy corn decorations (I also failed at making buttermilk biscuits, but that’s a story for another time)
The chocolate cake recipe is a little bit more complicated than the standard toss everything in the bowl procedure, but the result is moist, wonderful, chocolate-y cake! The recipe is called “The Best Chocolate Sheet Cake. Ever.”, though I’ve never actually used it to make a chocolate sheet cake. For the frosting, we made cream cheese frosting and dyed it orange with food coloring.
Gather up what you’ll need.

Melt the butter in a saucepan
in a measuring cup, measure out the butter milk, add the beaten eggs, baking soda and vanilla

When the butter has melted, add the cocoa and stir together. Then add in the boiling water

Pour this onto the dry ingredients

(sorry, can’t be bothered to rotate that right now)
Stir the chocolate and flour mixtures together to cool then add in the buttermilk. stir and pour into prepared pan.

Bake for 20 minutes

While those are cooling, whip up some cream cheese frosting. In a bowl combine cream cheese and butter. Then add in powdered sugar until it gets to the right consistency and taste.

Then for the fun part—food coloring! A good orange color has two components: 1) lots of food color and 2) more yellow than red (the box recommends a 2:3 ratio…but just keep adding and mixing until you get the color you want)


Frost, decorate, and refrigerate! These cupcakes need to be stored in the fridge because of the cream cheese frosting which gets really soupy if it warms up.

In the top row, second from the left….that’s a candy corn smiley face! Also, I apologize for getting my toes in the picture. oops!
For the cake:
Ingredients
  • 2 cups flour
  • 2 cups sugar
  • 1/4 tsp salt
  • 4 tbsp (heaping) unsweetened Cocoa (I used dark chocolate, but you can use whatever kind you happen to have around/find in the store)
  • 1 cup butter
  • 1 cup boiling water
  • 1/2 cup buttermilk
  • 2 whole eggs, beaten
  • 1 tsp baking soda
  • 1 tsp vanilla 
Directions
  1. In a heat-resistant mixing bowl combine flour, sugar and salt
  2. In a saucepan, start melting the butter. At this point it’s a good idea to get 1 cup boiling water ready to go as well
  3. While the butter is melting, pour the buttermilk into a measuring cup, beat the eggs and add them to the butter milk. Also add baking soda and vanilla to this.
  4. When the butter has melted, add the cocoa. Stir together then add the boiling water. Allow this to boil for 30 seconds, then turn off heat (or if you have an electric stove remove it from the burner).
  5. Pour over the dry ingredients and stir lightly to cool
  6. Add in the buttermilk and egg mixture and stir it in.
  7. Pour into a sheet cake pan/cup cake pan(s) and bake at 350 F for 20 min
Recipe from The Pioneer Woman
For the frosting:
Ingredients
  • 6 oz cream cheese, softened (unnecessary if you use spreadable variety)
  • 1/2 cup butter or margarine, softened
  • 2 tsp vanilla
  • min. 2 cups powdered sugar
Beat together the whipped cream, butter and vanilla until light and fluffy. Gradually add in 2 cups of powdered sugar, beating well. Gradually beat in 2.5 -2.75 cups* additional powdered sugar until it reaches spreading consistency. This should frost the top and sides of two 8 or 9 in round layers.
*I only added roughly 2 cups of powdered sugar
From: Better Homes and Gardens New Cook book, 11th ed

October 28, 2010

Tortelloni Minestrone Soup

Tortellini Minestrone Soup….sort of

I’ve really been craving some soup lately. Sadly, I missed the soup weather that disappeared at the beginning of this week. It’s still fairly cool in the morning, though, so that will just have to suffice. I also have been feeling like I need some more vegetables in my diet, hence the inspiration for making this soup. I really like making soup because it’s very simple, it doesn’t need to be precise, and you can customize it anyway you want it. It’s pretty hard to ruin soup.
Tortellini Minestrone Soup
Ingredients
  • 1 zucchini
  • 1 yellow squash
  • 1/2 yellow onion
  • 1-2 clove(s) minced garlic
  • 1 can garbanzo beans/chickpeas  
  • 1 package frozen (Italian) vegetables (you can use any sort of mixed veggies you want or be super cool and chop up fresh ingredients…which will take some more effort)
  • 1 can tomatoes
  • 5 cups vegetable broth (I just use vegetable bouillon cubes)
  • 1-2 cups tortellini (you can use any kind of pasta you want, though)
  • 1 tsp dried basil
  • 1/4 tsp dried oregano
  • salt and pepper
Directions
  1. Chop up the zucchini, yellow squash, onion and garlic. Add 1-2 tablespoons oil to a large pot and toss in the zucchini, yellow squash, onion and garlic. Let that soften up for around 5 minutes.


2. Add the vegetable broth, tomatoes, garbanzo beans, and frozen vegetables. Add in the basil, oregano, salt and pepper to taste. Bring to a boil then let simmer for 20 minutes. About half way through add the tortellini. If you use a different pasta you may need to adjust for how long it takes to cook or, alternatively, cook it prior to adding it to the soup towards the end of the 20 minutes. And that’s it!


I promise it looks more appealing in real life. I have a combination of a simple camera and poor lighting.
Wasn’t that simple? And you can customize it with any vegetables or seasonings you want (Translation: Whatever you happen to have lying around that you want to use up)
Happy almost weekend!

October 26, 2010

Highly Recommended

This weekend I fell in love. I am usually a French Roast or whatever is the house brew is kind of girl when it comes to coffee. While I was at an Einstein Bros. Bagels over the weekend, on a whim, I decided to try their Autumn Roast and I fell in love. It really is autumn in a warm, delightfully aromatic cup. :) If you have an Einstein Bros. near you, you should treat yourself to a cup. It definitely makes studying nerve, smell, and vision physiology much more bearable.
I also highly recommend baking some chocolate chip cookies “just because,” as they say. In my case, I quickly threw a batch together just because I love my boyfriend and he missed out on the last batch of chocolate chip cookies I made. These were better anyway. I used a different recipe and bittersweet chocolate chips rather than semi-sweet. When selecting a chocolate chip cookie recipe, using one that uses more brown sugar than white sugar rather than a 1:1 ratio is better, in my humble opinion at least.

(Making one GIANT cookie also recommended)

Lastly, if you ever need a quick endorphin pick-me-up, I recommend cuteoverload.com and The Daily Puppy (unless, of course, you are allergic to pictures and videos of cute, primarily young, animals; smiling; and laughing).

October 21, 2010

Brownies (somewhere between fudgey and cakey)

What better way to start off an evening of sleepily studying histology than baking some delicious brownies? Especially since I’ve never made brownies from scratch before! This recipe produces thick, moist brownies that are somewhere in between fudgey and cakey. They bake up to have a bit of a crisp top but the inside is soft, thick and moist.
I didn’t take any pictures while we were making them (oops!), but it’s pretty simple one-bowl recipe. You can melt the chocolate and butter either in a bowl over simmering water or by microwaving with intermittent stirring until it all melts. Unlike most baking recipes, these brownies will be overdone if you wait until a toothpick inserted in the center comes out clean. The toothpick may have a few moist clumps when pulled out when the brownies are done.
About Melting Chocolate:
Melting chocolate can be a tricky business. Water or overheating will make chocolate go clumpy or seize. It’s best to use a clean, dry heatproof bowl. Don’t try to rush the process. Chop the chocolate finely and put it in the bowl.
On the stove: Fill a pan with around 4 cm or 1.5 in of water that has been boiled and removed from heat. In a dry, heatproof bowl that fits the pan without touching the water, put the chocolate and let that sit while the chocolate softens. Once soft, stir until smooth and remove from the pan to cool slightly or keep it on the pan to keep it as a liquid. Overheating the chocolate will cause it to scorch, seize or clump, and taste bitter.
In the microwave: Place the chopped chocolate in a microwave safe bowl and cook it in 15-second bursts on 50% power. As it melts, it may maintain its shape but will become shiny and sag around the edges. If it clumps up too badly you can try adding a few drops of vegetable oil or shortening and stir until smooth.
from The Essential Dessert Cookbook by Bay Books
BrowniesRecipe adapted from JoyofBaking.com 
Ingredients
  • 5 oz (140 g) bittersweet chocolate, chopped or use chocolate chips
  • 1/2 cup unsalted butter, cut into pieces
  • 2 tbsp unsweetened coca powder (I used dark chocolate)
  • 1 cup white sugar
  • 1 tsp vanilla extract
  • 3 eggs
  • 3/4 flour
  • 1/4 tsp salt
  • (optional) 3/4 cups chocolate chips or nuts or other (I didn’t add this)

Turn the oven on to 350 F and prepare a square baking pan by greasing the bottom and sides.
Melt the butter and chocolate either in a microwavable bowl in the microwave, stopping to stir frequently or in a stainless steel bowl over simmering water. When melted, remove from heat and stir in the sugar and cocoa powder. Next whisk in the 3 eggs, one at a time, and vanilla. Next stir in the flour and salt. Add the optional chocolate chips or nuts if desired. Spoon into the prepared pan and bake for around 30 minutes or until a toothpick inserted in the center comes out with moist crumbles but not completely clean. Allow them to set awhile in the pan. Best served at room temperature.
Then enjoy!

October 15, 2010

Salted Caramel Pumpkin Blondies

Last weekend I really was on a pumpkin kick. I not only made pumpkin bread, but I also tried out this recipe for salted caramel pumpkin blondies. A blondie is like a brownie except instead of the focus being on chocolate it’s on brown sugar. Many other flavors can be incorporated into a blondie such as walnuts, pecans, chocolate chips, white chocolate chips, or coconuts, for example.
I adapted this recipe from Sing for your Supper. All I changed was substituting 3/4 of the butter with applesauce; instead of 2 sticks of butter I used 3/4 cup applesauce and 1/4 cup butter. The recipe also calls for salted caramel sauce. I decided to try my hand at making my own. I used a recipe from Smitten Kitchen. I didn’t have heavy cream so I had to use half and half, which I think results in a thinner sauce.
Here’s what you’ll need

Combine your dry ingredients in a smaller bowl and set them aside. In a large bowl, beat together the butter, applesauce and brown sugar. It won’t turn as fluffy as it would with just butter and brown sugar, but just combine it.

Beat in the egg and vanilla until combined then mix in the pumpkin. Mix in the dry ingredients and put the bowl in the fridge while you make the caramel sauce.
For the caramel sauce you’ll need salted butter, white sugar, and heavy cream if you’ve got it. Put the sugar in a sauce pan and start heating it up.

Note that I have an electric stove. This does not bode well for temperature changes, but I do what I can. Keep heating and stirring until the sugar turns a nice, dark amber color.


Don’t worry about clumps. Just keep stirring and they will eventually melt. When you get a nice brown color, add in the butter all at once and stir it in.

Once the butter is all melted, turn down the heat and add in the heavy cream (or half and half, whatever the case may be). I changed burners since that’s really the only way to get an electric stove to reduce heat quickly. On the down side, I didn’t let the other burner heat up enough before hand. Anyway this is the really cool part! When you add in the cream, it’ll foam up some and then you will get caramel! It’s so cool!


When you’ve sufficiently stirred, pull it off the burner and let it cool off some. Pull the batter back out of the fridge and add half the batter into a greased 9x9 baking dish. Pop that in the oven for 10 minutes. After 10 minutes, take it out of the oven and add the layer of caramel (add 1/2 tsp of salt sprinkled on top if you want). Spoon the rest of the batter on top as evenly as possible.

Pop it back in the oven for another 30 minutes or so until the top is golden brown. And that’s it!

(I don’t have toothpicks, hence the fork marks)

For the blondies:
Ingredients:
  • 1 1/4 cups brown sugar
  • 3/4 cup unsweetened applesauce
  • 1/4 cup unsalted butter at room temp
  • 2 cups all purpose flour
  • 1 tsp ground cinnamon
  • 1/4 tsp ground nutmeg
  • 1/8 tsp ground ginger
  • 1/8 tsp ground cloves
  • 1 tsp baking soda
  • 1/2 tsp salt
  • 1 large egg
  • 2 tsp vanilla extract
  • 1 cup pumpkin puree
  • 1/2-3/4 caramel sauce (or however much you want)
  • 1/2 tsp salt (optional)
Directions:
1. Preheat the oven to 350° F.  Butter a 9×9-inch baking dish. 
2. In a medium bowl, combine the flour, spices, baking soda and 1/2 teaspoon of the salt.  Stir together and set aside.
3. In a large bowl, beat together butter, apple sauce, and brown sugar for about 2 minutes.
4. Beat in the egg and vanilla until well combined. Mix in the pumpkin puree.
5. Add in the dry ingredients with mixer on low speed until just combined.
Optional: Put the batter in the fridge and make caramel sauce.
6. Pour half the batter in the prepared pan and smooth evenly. Bake for 10 minutes.
7. Remove from oven and spoon caramel in an even layer with the other ½ teaspoon. Spoon the remaining batter over the top and get it as even as possible. Put it in the oven and bake for 30 minutes or until golden brown and cooked through.
Adapted from recipe for salted caramel pumpkin blondies from Sing for your Supper
For the caramel sauce:
Ingredients
  • 1 cup sugar
  • 6 tbsp salted butter
  • 1/2 cup plus 2 tbsp heavy cream at room temperature (temperature is important)
Directions
1. Melt the sugar over medium to moderately high heat in a 2 or 3 qt pot. Whisk or stir the sugar as it melts. Keep stirring despite any clumping; it will even out.
2. When the melted sugar reaches a dark amber color add the butter all at once. Stir it in, turn down the heat to low and pour in the cream, whisking until you get a smooth sauce.
3. Use immediately or store in an air tight container for up to 2 weeks.
Recipe from Smitten Kitchen