Five days until the official start of my summer and counting! I’m so excited not even the annoyance of one silly, pointless exam or the overwhelming hurdle of the last anatomy exam can get me too down. For one thing is just about exactly four days I will never again have to set foot in the anatomy lab unless I lose my mind and decide I really like it or something (yeah, like that’s going to happen). As countdowns are dwindling and coastal southern California’s “June gloom” sets in, things for me are becoming more real and more exciting! Even more exciting than the last day of anatomy ever! (Anatomy side note: I have even more respect for doctor’s of my mother’s generation, and earlier I’m sure, who not only suffered through the dehumanization process, gut-wrenching smell, and terrible awful cold that is part and parcel of anatomy, but they did it without gloves, and for some without the benefit of wearing scrubs! I would never have made it that way. I barely made it as it is. Thankfully, I have managed to not lose any of my fingers to frost bite yet) Last week, we got our marriage license. Who knew that passably interesting old (by California standards) buildings existed in Orange County?

Several loose ends for school were tied up and finished off last week as well. I can’t really believe that first year is really almost over and that we all really made it through those 30+ exams that seemed such a daunting number last August. This past weekend was spent with yummy food, cramming in some studying, and apartment hunting! We found a couple places we would very much like to live, but we have to wait a little bit before we get everything settled more firmly. And this week? This week is all about the head and neck and a little bit about everything else in the body.
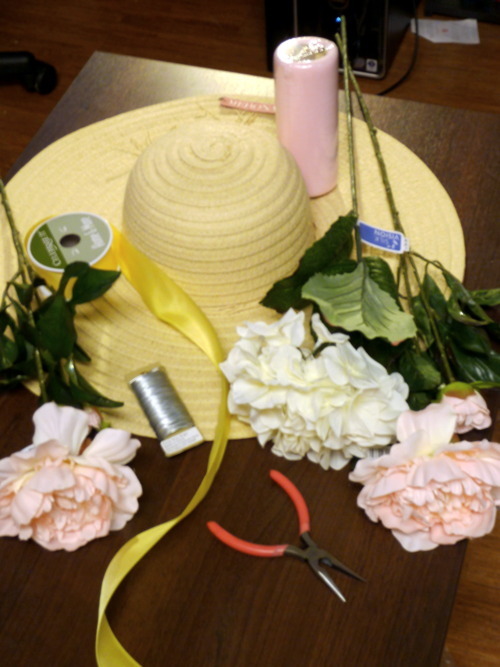
Next weekend is the start of summer, which will kick off with a lovely little themed gathering of some of my favorite people! That brings me to the subject of this non-baking or cooking related post, namely, a craft project in honor of this little shindig. I’m going to preface this by saying this is probably the “craftiest” thing I’ve done/made in a few years. It was pretty fun. To start out this project, you’ll need a glue gun with glue sticks (you can find them for $5! at Target or Michaels), a pretty ridiculous hat to decorate, and whatever it is you want to use to decorate said hat.
Don’t forget the glue gun!
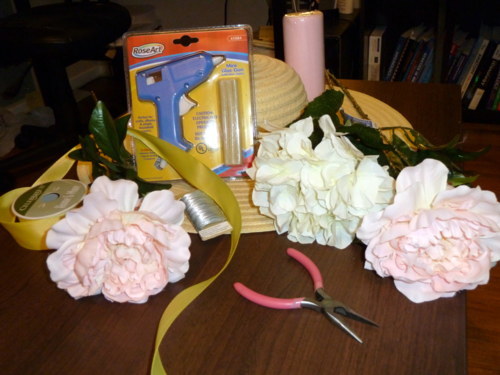
Something else that would be VERY helpful but is not pictured here is a pair of wire cutters. Without them, cutting the stems off the flowers will take a bit more effort and be a touch lacking in precision. To start out, if your hat has any sort of decoration on it that you don’t want, check to see if it was just glued on. In my case, there was a little string decoration on the hat. To remove it, take a blow dryer and blow it on the glue. The glue will heat up and you will be able to remove whatever it is you don’t want. Remember this technique, it is also your ctrl + z for this little project.
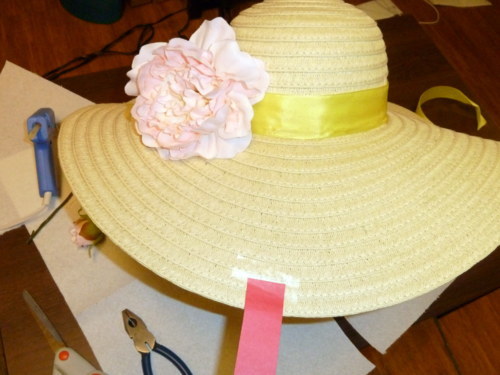
Next, use tape or a post-it to mark either the front of the hat or the part of the hat where you want your decorations. I marked the front of the hat.

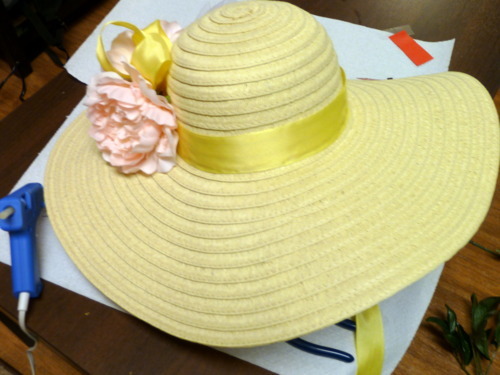
Take your wired ribbon (the wire is important) and start gluing it around the base of hat. Make sure you start and end the ribbon underneath where you will eventually be putting the rest of the hat decoration, like I’ve done above. Before you glue down the top half of the end of the ribbon, use your nimble fingers if you’ve got them or some needle nose pliers to pull on the top wire so that the top of the ribbon lies flat against the hat. Bend the wire when you’ve got the ribbon lying how you’d like it. Once you’ve done that, go ahead and and glue down that last corner of ribbon.
Next, cut the stems off the flowers and cut the individual flowers off. Leave a bit of stem so you can glue the flower to the hat still. Practice arranging the different decorations without gluing them down. Once you’ve decided at least on the major components of the decoration you can start to glue them down. You just need a little bit of glue applied to the stem and then press and hold it to the hat for around 15 seconds so the glue has time to set. Careful not to burn your fingers, the glue can get very hot. Also, try not to accidentally let the glue drip on your fingers, they will burn (trust me, it stings quite a bit for a day or so)!
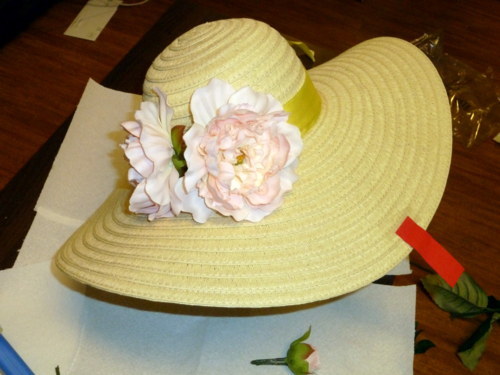
Just keep adding what you want in.
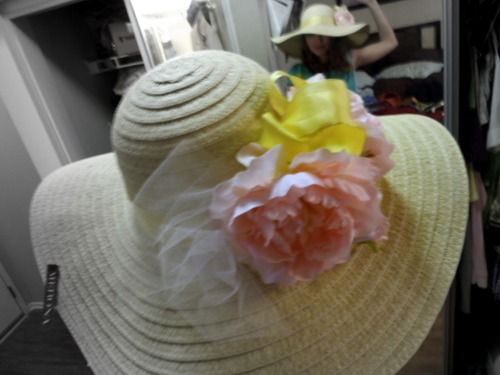
At this point, it took me quite some time to figure out how exactly to finish off the hat. The main objective that remained to fulfill is to cover up the stems so that the mechanics & support of the design aren’t seen from any direction. You can do this with ribbon, netting or tulle, other flowers or buds, feathers, anything you want really. After probably 10-15 minutes of playing around with it, I decided to add some tulle to the back and fill up the space on top, between the two large flowers, with ribbon and another bud. To add netting, tulle, or ribbon, you’re going to use the same technique. You’re going to make some unevenly sized loops of, for example tulle. Once you’ve done that to your satisfaction, take some floral wire (it’s thin and easy to bend) and wrap it around the base of the loops so that they stay. Finally, you will put the glue on the wire and attach it to the hat.
First I added the tulle on the back.
I then played around with the ribbon and bud to figure out how to fill that space in the middle without overwhelming the other elements.
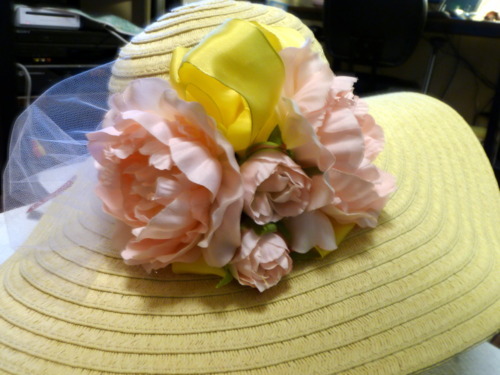
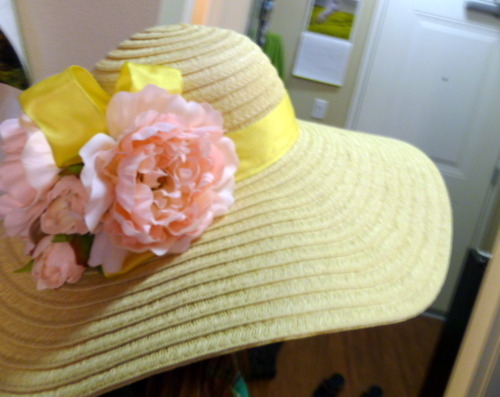
I ended up putting two loops of ribbon (that you can’t see very well) at the bottom of everything and pulling them out a bit underneath the two flowers and on either side of the lower bud. Once you glue the base of the ribbon loops down, you can pull and arrange the loops however you like. Once I did that, I added another bud and some ribbon loops on the top to cover the stems and glue from above.
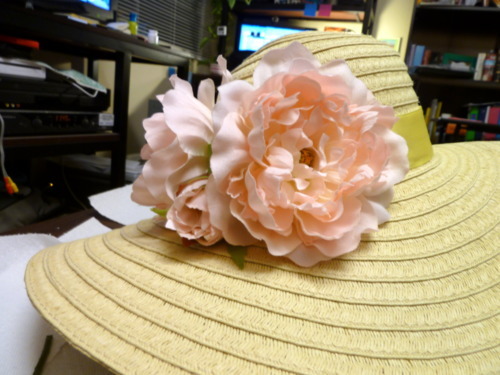
Voila! An awesomely fun and simple hat for a tea, hat & croquet themed shindig. All told, it took me around 2 hours to finish this, however, had I had all the proper equipment (i.e. wire cutters), no distractions, no finger burning incidents, less indecision on design, and a more ideal workspace set up (you know, not sitting on the floor, using a coffee table as the table, and having the glue gun plugged in about 3 feet above my head) it could easily be done in much less time (more like 20-30 minutes).
I never thought I’d say this about a craft project, but it was pretty fun. :)
I am very much indebted to these very helpful and instructional videos. I’ve no crafting abilities or know-how whatsoever of my own.
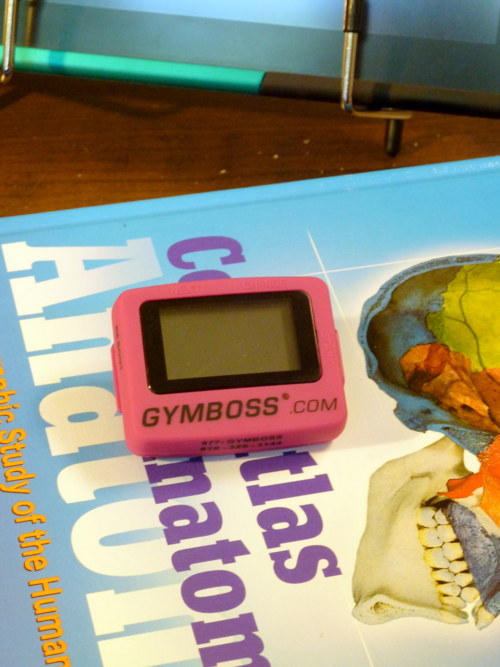
On a side note, I got my Gymboss timer this week!! I’m so excited!
Next week(-ish), carrot cake!

Several loose ends for school were tied up and finished off last week as well. I can’t really believe that first year is really almost over and that we all really made it through those 30+ exams that seemed such a daunting number last August. This past weekend was spent with yummy food, cramming in some studying, and apartment hunting! We found a couple places we would very much like to live, but we have to wait a little bit before we get everything settled more firmly. And this week? This week is all about the head and neck and a little bit about everything else in the body.
Next weekend is the start of summer, which will kick off with a lovely little themed gathering of some of my favorite people! That brings me to the subject of this non-baking or cooking related post, namely, a craft project in honor of this little shindig. I’m going to preface this by saying this is probably the “craftiest” thing I’ve done/made in a few years. It was pretty fun. To start out this project, you’ll need a glue gun with glue sticks (you can find them for $5! at Target or Michaels), a pretty ridiculous hat to decorate, and whatever it is you want to use to decorate said hat.
Don’t forget the glue gun!
Something else that would be VERY helpful but is not pictured here is a pair of wire cutters. Without them, cutting the stems off the flowers will take a bit more effort and be a touch lacking in precision. To start out, if your hat has any sort of decoration on it that you don’t want, check to see if it was just glued on. In my case, there was a little string decoration on the hat. To remove it, take a blow dryer and blow it on the glue. The glue will heat up and you will be able to remove whatever it is you don’t want. Remember this technique, it is also your ctrl + z for this little project.
Next, use tape or a post-it to mark either the front of the hat or the part of the hat where you want your decorations. I marked the front of the hat.
Take your wired ribbon (the wire is important) and start gluing it around the base of hat. Make sure you start and end the ribbon underneath where you will eventually be putting the rest of the hat decoration, like I’ve done above. Before you glue down the top half of the end of the ribbon, use your nimble fingers if you’ve got them or some needle nose pliers to pull on the top wire so that the top of the ribbon lies flat against the hat. Bend the wire when you’ve got the ribbon lying how you’d like it. Once you’ve done that, go ahead and and glue down that last corner of ribbon.
Next, cut the stems off the flowers and cut the individual flowers off. Leave a bit of stem so you can glue the flower to the hat still. Practice arranging the different decorations without gluing them down. Once you’ve decided at least on the major components of the decoration you can start to glue them down. You just need a little bit of glue applied to the stem and then press and hold it to the hat for around 15 seconds so the glue has time to set. Careful not to burn your fingers, the glue can get very hot. Also, try not to accidentally let the glue drip on your fingers, they will burn (trust me, it stings quite a bit for a day or so)!
Just keep adding what you want in.
At this point, it took me quite some time to figure out how exactly to finish off the hat. The main objective that remained to fulfill is to cover up the stems so that the mechanics & support of the design aren’t seen from any direction. You can do this with ribbon, netting or tulle, other flowers or buds, feathers, anything you want really. After probably 10-15 minutes of playing around with it, I decided to add some tulle to the back and fill up the space on top, between the two large flowers, with ribbon and another bud. To add netting, tulle, or ribbon, you’re going to use the same technique. You’re going to make some unevenly sized loops of, for example tulle. Once you’ve done that to your satisfaction, take some floral wire (it’s thin and easy to bend) and wrap it around the base of the loops so that they stay. Finally, you will put the glue on the wire and attach it to the hat.
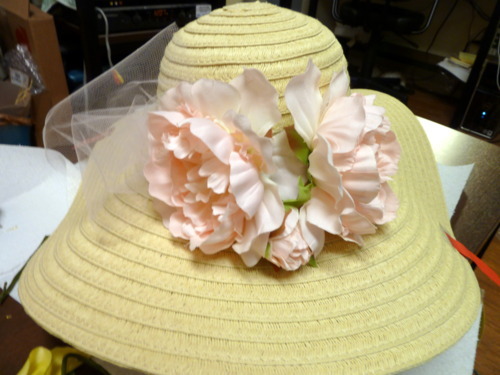
First I added the tulle on the back.
I then played around with the ribbon and bud to figure out how to fill that space in the middle without overwhelming the other elements.
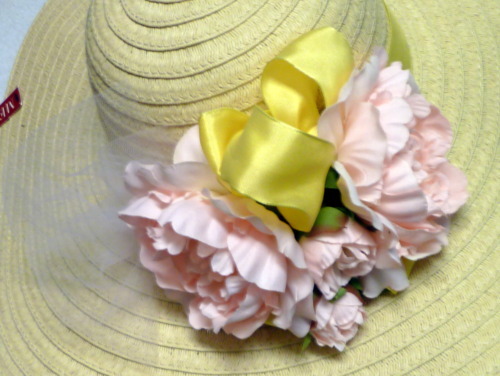
I ended up putting two loops of ribbon (that you can’t see very well) at the bottom of everything and pulling them out a bit underneath the two flowers and on either side of the lower bud. Once you glue the base of the ribbon loops down, you can pull and arrange the loops however you like. Once I did that, I added another bud and some ribbon loops on the top to cover the stems and glue from above.
Voila! An awesomely fun and simple hat for a tea, hat & croquet themed shindig. All told, it took me around 2 hours to finish this, however, had I had all the proper equipment (i.e. wire cutters), no distractions, no finger burning incidents, less indecision on design, and a more ideal workspace set up (you know, not sitting on the floor, using a coffee table as the table, and having the glue gun plugged in about 3 feet above my head) it could easily be done in much less time (more like 20-30 minutes).
I never thought I’d say this about a craft project, but it was pretty fun. :)
I am very much indebted to these very helpful and instructional videos. I’ve no crafting abilities or know-how whatsoever of my own.
On a side note, I got my Gymboss timer this week!! I’m so excited!
Next week(-ish), carrot cake!
No comments:
Post a Comment